Rda Imei Repair Tool Download
Rda Imei Repair Tool Download Procedure for Repair IMEI on RDA Chipset Devices by
Procedure for Repair IMEI on RDA Chipset Devices by using RDA IMEI tool
Step 1: First of all Download and install the Android USB Driver for your device into your Computer . If you have already installed the USB drivers then SKIP this step .
Step 2: Download and Install RDA IMEI tool into your computer .
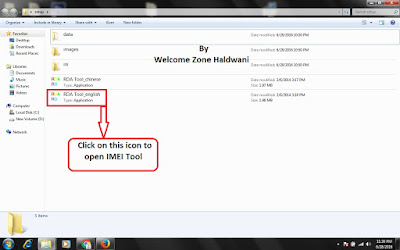
Step 3: Open RDA IMEI tool by clicking on the icon “RDA Tool_english”
rda imei tutorial

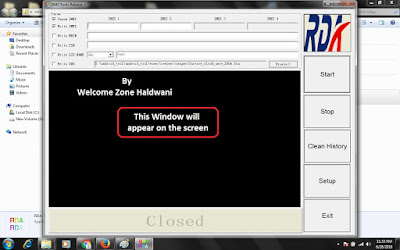
This Window will appear on the screen

rda imei tutorial
Step 4: Now, put the valid IMEI and click on “start” . rda imei tutorial

Step 5: Now, Power Off your Android smartphone .
Step 6: Now its time to connect your Android Smartphone device or Tablets to the Computer via using USB Cable And power on the phone .
Step 7: once IMEI repair completed successfully, A Succeeds Window will appear on the screen now ,Click on “OK” to Close it.
Step 8: Now, close the tool by clicking on the “Exit” Button.
Step 9: Now Restart your device .
Congratulation, It means you have been successfully repair the IMEI of your Android Device .
Download
![]()
SEE ALSO :-
RDA Flash Tool Latest Version Download
RDA Chipset Working USB Drivers Full Package
Important Notes :-
Charge Your Android Device Upto Minimum 60% – 80% before using this Tool .
This tool will only works on RDA chipset Devices .
Please use a valid IMEI .

